Toyota 4Runner: Disassembly
DISASSEMBLY
PROCEDURE
1. DISCONNECT CABLE FROM NEGATIVE BATTERY TERMINAL
NOTICE:
When disconnecting the cable, some systems need to be initialized after the cable
is reconnected (See page .gif) ).
).
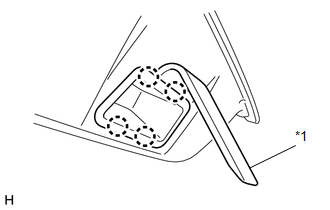
2. REMOVE DOOR PULL HANDLE
|
(a) Using moulding remover, detach the 4 claws to remove the door pull handle. Text in Illustration
HINT: Use the same procedure for all door pull handles. |
|
3. REMOVE BACK DOOR LOCK PROTECTOR SUB-ASSEMBLY
|
(a) Detach the 2 claws to remove the back door lock protector sub-assembly. |
|
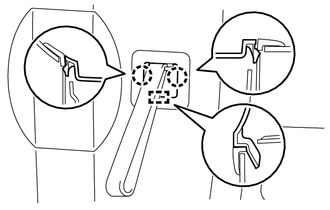
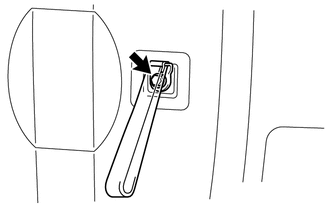
4. REMOVE ASSIST STRAP HOLE COVER
|
(a) Detach the 2 claws and guide to remove the assist strap hole cover. |
|
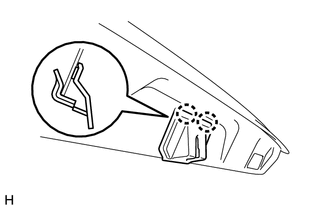
5. REMOVE ASSIST STRAP ASSEMBLY
|
(a) Remove the bolt and assist strap assembly. |
|
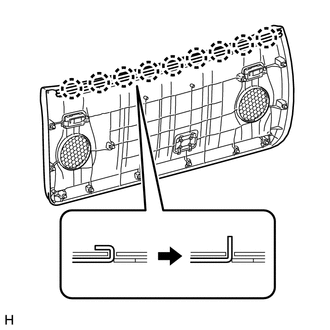
6. REMOVE BACK DOOR TRIM PANEL ASSEMBLY
|
(a) Detach the 12 clips by pulling the back door trim panel assembly. |
|
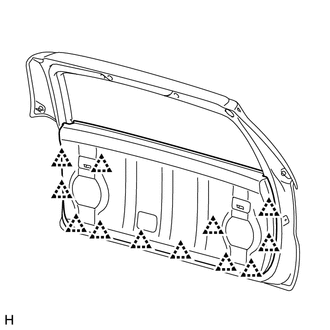
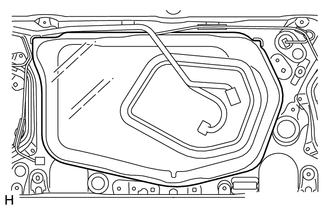
7. REMOVE BACK DOOR GLASS WEATHERSTRIP
|
(a) Raise the 9 claws of the back door glass weatherstrip to remove the back door glass weatherstrip from the back door trim panel assembly as shown in the illustration. |
|
8. REMOVE REAR NO. 2 SPEAKER ASSEMBLY
9. REMOVE MULTIPLEX NETWORK DOOR ECU
|
(a) Disconnect the 3 connectors to detach the 2 clamps. |
|
|
(b) Remove the 3 screws. |
|
|
(c) Using a clip remover, detach the 2 clips to remove the multiplex network door ECU. |
|

10. REMOVE NO. 2 BACK DOOR SERVICE HOLE COVER
|
(a) Remove the No. 2 back door service hole cover. NOTICE: Remove any remaining tape on the back door side. |
|
11. REMOVE BACK DOOR SERVICE HOLE COVER LH
|
(a) Detach the clamp to move the wire harness out of the way. |
|
(b) Remove the 5 screws.
(c) Using a clip remover, detach the 2 clips to remove the back door service hole cover LH.
12. REMOVE BACK DOOR SERVICE HOLE COVER RH
|
(a) Detach the clamp to move the wire harness out of the way. |
|
(b) Remove the 5 screws.
(c) Using a clip remover, detach the 2 clips to remove the back door service hole cover RH.
13. REMOVE BACK DOOR OUTSIDE MOULDING LH
14. REMOVE BACK DOOR OUTSIDE MOULDING RH
15. REMOVE REAR NO. 1 SPOILER COVER
16. REMOVE REAR SPOILER SUB-ASSEMBLY
17. REMOVE REAR WIPER ARM
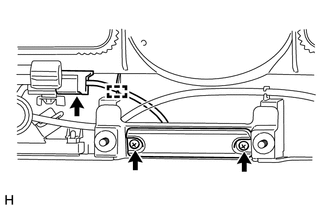
18. REMOVE REAR WIPER MOTOR AND BRACKET ASSEMBLY
19. REMOVE NO. 1 BACK WINDOW WIPER MOTOR BRACKET
|
(a) Remove the 3 bolts. |
|
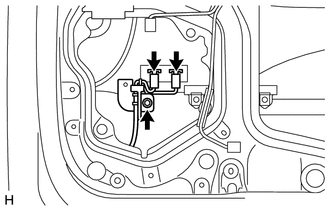
(b) Using a clip remover, detach the 2 clips to remove the No. 1 back window wiper motor bracket.
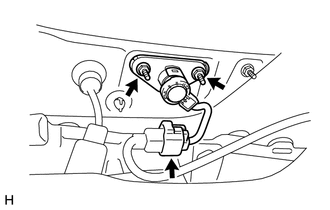
20. REMOVE REAR WASHER NOZZLE
21. REMOVE REAR WIPER STOPPER
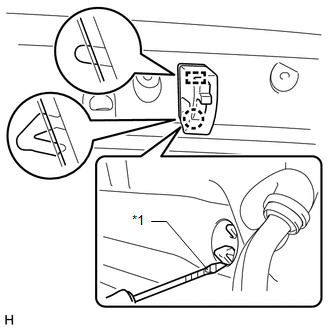
|
(a) Insert a screwdriver into the rear spoiler service hole, detach the claw to remove the rear wiper stopper. Text in Illustration
|
|
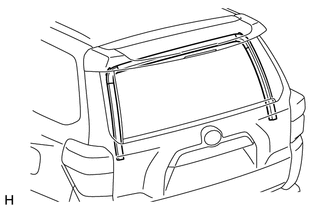
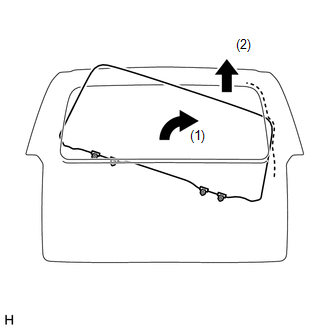
22. REMOVE BACK DOOR GLASS RUN
|
(a) Remove the back door glass run. |
|
23. REMOVE BACK DOOR GLASS
(a) Temporarily connect the multiplex network body ECU connectors.
|
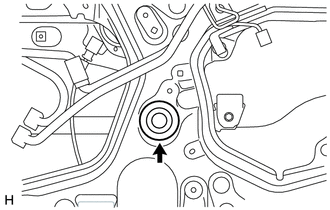
(b) Remove the hole plug. |
|
(c) Connect the cable to the negative (-) battery terminal.
|
(d) Move the back door glass until the 4 bolts can be seen through the service holes. |
|
(e) Disconnect the cable from the negative (-) battery terminal.
NOTICE:
When disconnecting the cable, some systems need to be initialized after the cable
is reconnected (See page ).
(f) Disconnect the multiplex network body ECU connectors.
|
(g) Remove the bolt to disconnect the 2 defogger connectors. |
|
|
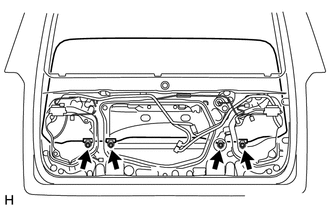
(h) Remove the 4 bolts. |
|
|
(i) Remove the back door glass as shown in the illustration. |
|
(j) Disconnect the rear window connector.
(k) Disconnect the multiplex network door ECU connector.
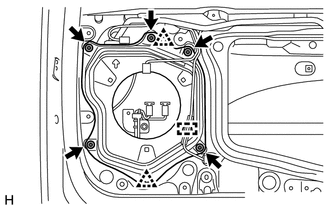
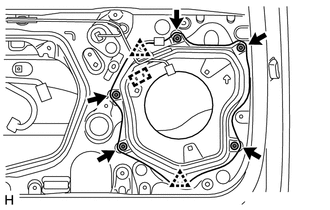
24. REMOVE OUTER BACK DOOR GLASS WEATHERSTRIP ASSEMBLY
25. REMOVE BACK DOOR LOCK ASSEMBLY
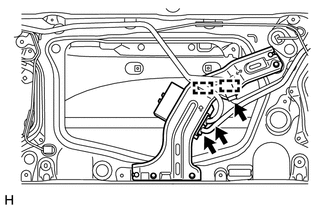
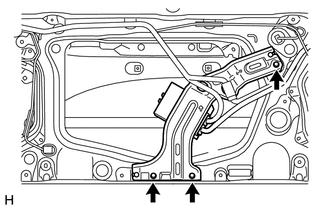
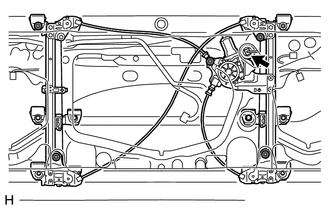
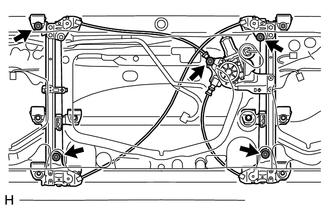
26. REMOVE BACK DOOR POWER WINDOW REGULATOR SUB-ASSEMBLY
|
(a) Disconnect the power window regulator motor assembly LH connector. |
|
|
(b) Remove the 5 bolts and back door power window regulator sub-assembly. HINT: Remove the back door power window regulator sub-assembly through the service hole. |
|
27. REMOVE POWER WINDOW REGULATOR MOTOR ASSEMBLY LH
28. REMOVE BACK DOOR LOCK CYLINDER (w/o Smart Key System)
|
(a) Disconnect the connector. |
|
(b) Remove the 2 nuts and back door lock cylinder.
HINT:
Remove the back door lock cylinder through the service hole.
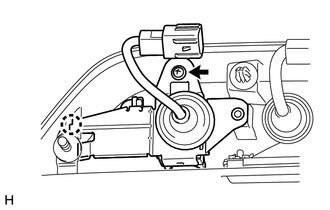
29. REMOVE BACK DOOR OUTSIDE GARNISH
30. REMOVE REAR TELEVISION CAMERA ASSEMBLY
31. REMOVE BACK DOOR OPENER SWITCH ASSEMBLY
|
(a) Disconnect the connector. |
|
(b) Detach the guide.
(c) Remove the 2 screws and back door opener switch assembly.
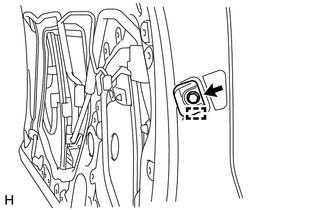
32. REMOVE LICENSE PLATE LIGHT ASSEMBLY
33. REMOVE BACK DOOR CONTROL SWITCH (w/ Smart Key System)
|
(a) Remove the screw. |
|
(b) Detach the claw and remove the back door control switch.
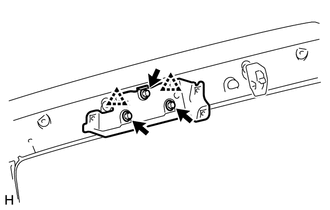
34. REMOVE BACK DOOR LOWER STOPPER
|
(a) Remove the bolt. |
|
(b) Detach the guide and back door lower stopper.
HINT:
Use the same procedure as for the LH side.
35. REMOVE BACK DOOR PANEL CUSHION
|
(a) Detach the claw to remove the 2 back door panel cushions. |
|
36. REMOVE BACK DOOR DAMPER STAY SUB-ASSEMBLY LH
37. REMOVE BACK DOOR DAMPER STAY SUB-ASSEMBLY RH
HINT:
Use the same procedure as for the LH side.
38. REMOVE BACK DOOR STAY BOLT (for LH Side)
39. REMOVE BACK DOOR STAY BOLT (for RH Side)
HINT:
Use the same procedure as for the LH side.
40. REMOVE BACK DOOR UPPER DAMPER STAY BRACKET LH
41. REMOVE BACK DOOR UPPER DAMPER STAY BRACKET RH
HINT:
Use the same procedure as for the LH side.
 Components
COMPONENTS
ILLUSTRATION
ILLUSTRATION
ILLUSTRATION
ILLUSTRATION
ILLUSTRATION
...
 Adjustment
ADJUSTMENT
CAUTION / NOTICE / HINT
HINT:
Use the same procedure for the RH side and LH side.
The following procedure is for the LH side.
Centering bolts are used to mount the do ...
Other materials about Toyota 4Runner:
Lost Communication with ECM (U0100,U0142,U0155)
DESCRIPTION
The air conditioning amplifier communicates with the ECM, main body ECU (multiplex
network body ECU) and combination meter through the CAN communication system.
DTC Code
DTC Detection Condition
Trouble Area
...
Problem Symptoms Table
PROBLEM SYMPTOMS TABLE
HINT:
Use the table below to help determine the cause of problem symptoms.
If multiple suspected areas are listed, the potential causes of the symptoms
are listed in order of probability in the "Suspected Area" ...
0.0076