Toyota 4Runner: Using the interior lights
Interior lights list
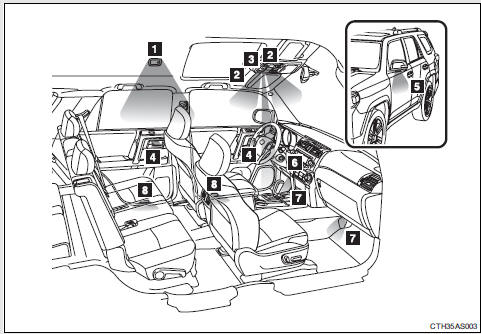
1. Rear interior light 2. Front interior light/front personal lights 3. Shift lever light (when the engine switch is in the “ACC” or “ON” position [without a smart key system] or “ENGINE START STOP” switch is in ACCESSORY or IGNITION ON mode [with a smart key system]) 4. Inside door handle lights (if equipped) 5. Outer foot lights (if equipped) 6. Engine switch light (vehicles without a smart key system) 7. Footwell lights (if equipped) 8. Door courtesy lights (if equipped)
Turning the instrument panel light control dial fully downward disables the inside door handle lights, footwell lights and shift lever light.
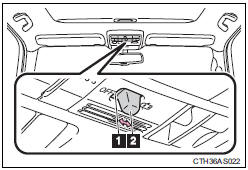
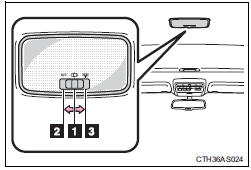
Interior lights
Front
1. Turns the lights off 2. Turns the door position on
Rear
1. Turns the door position on
2. Turns the light off
3. Turns the light on
Personal lights
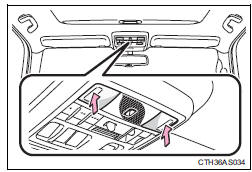
Turns the lights on/off
Illuminated entry system
Vehicles without a smart key system
The lights automatically turn on/off according to the engine switch position, whether the doors are locked/unlocked, and whether the doors are open/ closed.
Vehicles with a smart key system
he lights automatically turn on/off according to “ENGINE START STOP” switch mode, the presence of the electronic key, whether the doors are locked/unlocked, and whether the doors are open/closed.
To prevent battery discharge
If the following lights remain on, the lights will go off automatically after 20 minutes:
• Engine switch light
• Front interior light
• Rear interior light
• Personal light
• Footwell lights
• Inside door handle lights
• Door courtesy lights
Customization that can be configured at Toyota dealer
Settings (e.g. the time elapsed before lights turn off) can be changed.
(Customizable features )
 Using the phone book
To enter the menu of each setting, follow the steps below:
• Adding a new phone number 1. “Phonebook” → 2. “Add Entry”
• Setting speed dial 1. “Phonebook” → 2. “Speed Dial (Se ...
 Using the storage features
List of storage features
1. Auxiliary boxes
2. Glove box
3. Bottle holders
4. Tissue pocket
5. Cup holders
6. Pen holder
7. Console box
8. Coin holder
CAUTION
Items that should not ...
Other materials about Toyota 4Runner:
VSC OFF Indicator Light Remains ON
DESCRIPTION
Operation of the VSC OFF switch changes the vehicle between normal mode, TRAC
OFF mode*1 (AUTO LSD mode*2) and VSC OFF mode. During normal mode, pressing the
VSC OFF switch for a short amount of time changes vehicle to TRAC OFF mode*1 (AUTO
...
Shift Solenoid "B" Control Circuit Low (Shift Solenoid Valve S2) (P0976,P0977)
DESCRIPTION
Shifting from 1st to 5th is performed in combination with the ON and OFF operation
of the shift solenoid valves SL1, SL2, S1, S2 and SR, which is controlled by the
ECM. If an open or short circuit occurs in one of the shift solenoid valves, th ...

0.0083