Toyota 4Runner: Rear Stabilizer Bar(w/o Kdss)
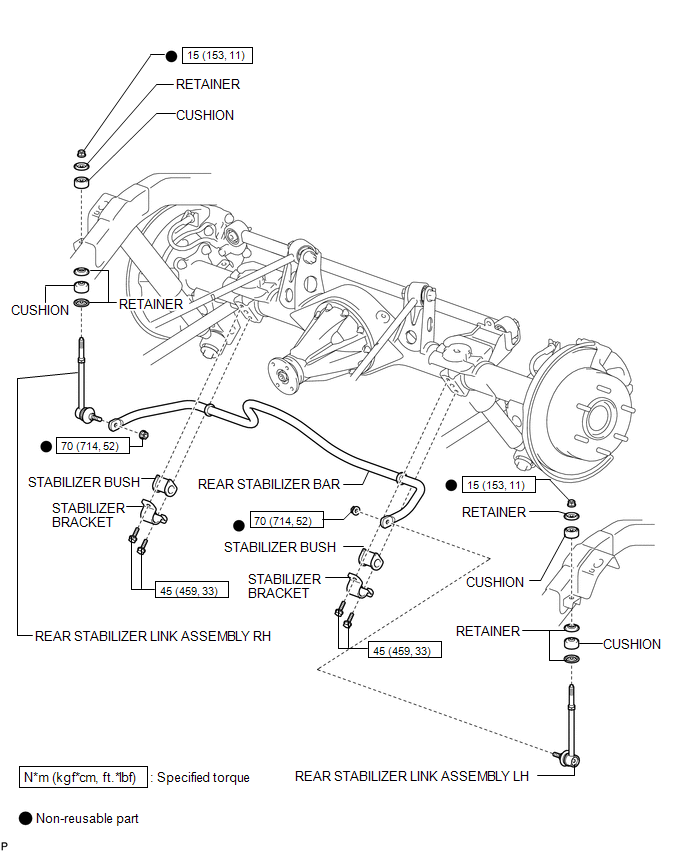
Components
COMPONENTS
ILLUSTRATION
Inspection
INSPECTION
PROCEDURE
1. INSPECT REAR STABILIZER LINK ASSEMBLY
|
(a) As shown in the illustration, flip the ball joint stud back and forth 5 times. |
|
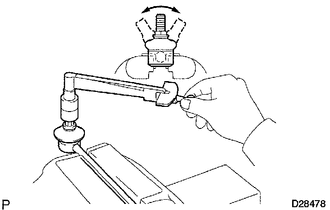
(b) Using a torque wrench, turn the nut continuously at a rate of 3 to 5 seconds per turn and take a torque reading on the 5th turn.
Standard turning torque:
0.05 to 1.96 N*m (0.51 to 20 kgf*cm, 0.44 to 17.3 in.*lbf)
Removal
REMOVAL
PROCEDURE
1. REMOVE REAR WHEEL
2. REMOVE REAR STABILIZER LINK ASSEMBLY LH
|
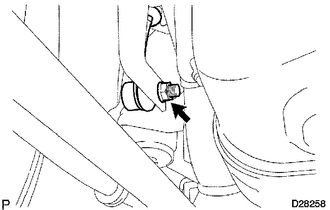
(a) Remove the nut and disconnect the stabilizer bar from the stabilizer link. HINT: If the ball joint turns together with the nut, use a 6 mm hexagon wrench to hold the stud. |
|
|
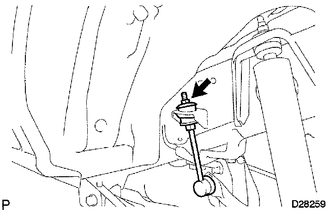
(b) Hold the stabilizer bar link with a wrench and remove the nut, retainer, cushion and link. |
|
(c) Remove the 2 retainers and cushion from the stabilizer link.
3. REMOVE REAR STABILIZER LINK ASSEMBLY RH
HINT:
Use the same procedure described for the LH side.
4. REMOVE REAR STABILIZER BAR
|
(a) Remove the 4 bolts, 2 stabilizer brackets and stabilizer bar. |
|
(b) Remove the 2 stabilizer bushes from the stabilizer bar.
Installation
INSTALLATION
PROCEDURE
1. INSTALL REAR STABILIZER BAR
(a) Install the 2 stabilizer bushes to the stabilizer bar.
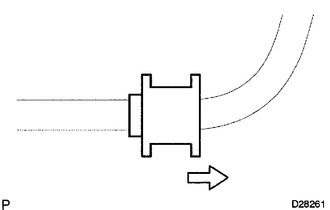
HINT:
Install the stabilizer bush to the outer side of the stabilizer bush stopper on the stabilizer bar.
Text in Illustration
.png) |
Outer Side |
(b) Install the stabilizer bar and 2 stabilizer brackets with the 4 bolts.
Torque:
45 N·m {459 kgf·cm, 33 ft·lbf}
2. INSTALL REAR STABILIZER LINK ASSEMBLY LH
(a) Install the stabilizer link with a new nut.
Torque:
70 N·m {714 kgf·cm, 52 ft·lbf}
HINT:
If the ball joint turns together with the nut, use a 6 mm hexagon wrench to hold the stud.
(b) Install the 2 retainers and cushion to the stabilizer link.
(c) Hold the stabilizer bar link with a wrench, and then install the retainer, cushion and link with a new nut.
Torque:
15 N·m {153 kgf·cm, 11 ft·lbf}
3. INSTALL REAR STABILIZER LINK ASSEMBLY RH
HINT:
Use the same procedure described for the LH side.
4. INSTALL REAR WHEEL
Torque:
for aluminum wheel :
103 N·m {1050 kgf·cm, 76 ft·lbf}
for steel wheel :
112 N·m {1142 kgf·cm, 83 ft·lbf}
 Installation
INSTALLATION
PROCEDURE
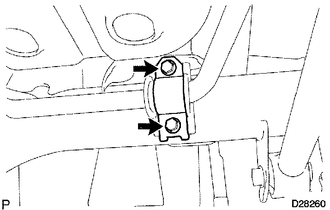
1. INSTALL REAR STABILIZER LINK ASSEMBLY
(a) Install the rear stabilizer link assembly with the bolt and nut.
Torque:
100 N·m {1020 kgf·cm, 74 ft·lbf}
HINT:
Turn the ...
 Rear Suspension System
Problem Symptoms Table
PROBLEM SYMPTOMS TABLE
HINT:
Use the table below to help determine the cause of problem symptoms. If multiple
suspected areas are listed, the potential causes of the symp ...
Other materials about Toyota 4Runner:
Pressure Control Solenoid "D" Performance (Shift Solenoid Valve SLT) (P2714)
DESCRIPTION
The linear solenoid valve (SLT) controls the transmission line pressure for smooth
transmission operation based on signals from the throttle position sensor and vehicle
speed sensor. The ECM adjusts the duty ratio* of the SLT solenoid valve ...
Dtc Check / Clear
DTC CHECK / CLEAR
CHECK DTC
(a) Connect the Techstream to the DLC3.
(b) Turn the ignition switch to ON.
(c) Turn the Techstream on.
(d) Enter the following menus: Body Electrical / Navigation System / Trouble
Codes.
(e) Check for DTCs (Click here ).
...

0.0251