Toyota 4Runner: Removal
REMOVAL
CAUTION / NOTICE / HINT
HINT:
- Use the same procedure for both the RH and LH sides.
- The procedure listed below is for the LH side.
PROCEDURE
1. REMOVE ROOF HEADLINING ASSEMBLY
(See page .gif) )
)
2. REMOVE ROOF SIDE RAIL GARNISH ASSEMBLY LH
|
(a) Detach the 3 clips. |
|
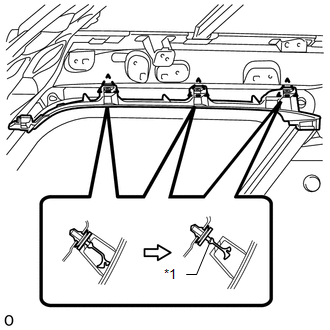
(b) Cut off the 3 clips to remove the roof side rail garnish assembly LH.
(c) Remove 3 clips from the vehicle body.
Text in Illustration|
*1 |
Clip |
3. DISCONNECT WINDOW GLASS ANTENNA WIRE
|
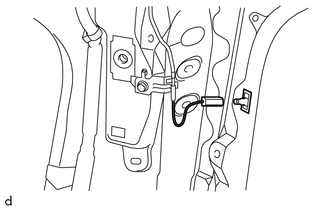
(a) Disconnect the window glass antenna wire connector (for LH side). |
|
|
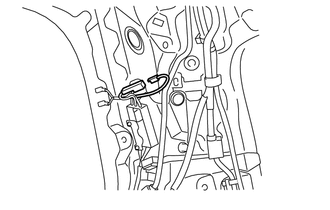
(b) Disconnect the window glass antenna wire connector (for RH side). |
|
4. REMOVE REAR QUARTER WINDOW ASSEMBLY LH
|
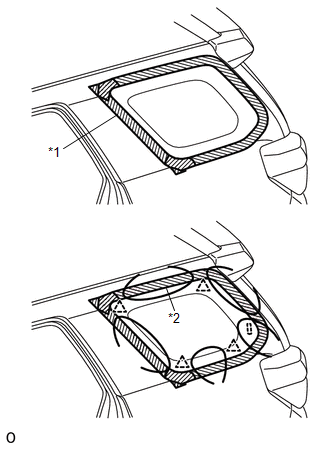
(a) From the interior, insert a piano wire between the vehicle body and rear quarter window assembly LH as shown in the illustration. Text in Illustration
NOTICE: When separating the rear quarter window assembly LH from the vehicle body, be careful not to damage the vehicle paint or interior/exterior ornaments. HINT: Apply protective tape to the outer surface of the vehicle body to prevent scratches. |
|
|
(b) Tie objects that can serve as handles (for example, wooden blocks) to both wire ends. |
|

(c) Cut through the adhesive by pulling the piano wire around the rear quarter window assembly LH.
NOTICE:
Leave as much adhesive on the vehicle body as possible when removing the rear quarter window assembly LH.
(d) Using suction cups, remove the rear quarter window assembly LH.
5. REMOVE REAR QUARTER WINDOW ASSEMBLY RH
6. CLEAN VEHICLE BODY
|
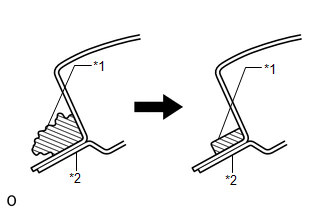
(a) Clean and shape the contact surface of the vehicle body. Text in Illustration
(1) On the contact surface of the vehicle body, use a knife to cut away excess adhesive as shown in the illustration. NOTICE: Be careful not to damage the vehicle body. HINT: Leave as much adhesive on the vehicle body as possible. (2) Clean the contact surface of the vehicle body with cleaner. HINT: Even if all the adhesive has been removed, clean the vehicle body. |
|
 Components
COMPONENTS
ILLUSTRATION
...
 Installation
INSTALLATION
CAUTION / NOTICE / HINT
HINT:
Use the same procedure for both the RH and LH sides.
The procedure listed below is for the LH side.
PROCEDURE
1. INSTALL QUARTER WINDO ...
Other materials about Toyota 4Runner:
Reassembly
REASSEMBLY
PROCEDURE
1. INSTALL MASTER CYLINDER RESERVOIR GROMMET
(a) Apply a light coat of lithium soap base glycol grease to 2 new master cylinder
reservoir grommets.
(b) Install the 2 master cylinder reservoir grommets to the brake master cylinder
r ...
ECU Power Source Circuit
DESCRIPTION
This circuit provides power to operate the transponder key ECU assembly.
WIRING DIAGRAM
CAUTION / NOTICE / HINT
NOTICE:
Inspect the fuses for circuits related to this system before performing the following
inspection procedure.
PROCEDURE
...

0.0271