Toyota 4Runner: Removal
REMOVAL
PROCEDURE
1. DISCONNECT CABLE FROM NEGATIVE BATTERY TERMINAL
NOTICE:
When disconnecting the cable, some systems need to be initialized after the cable
is reconnected (See page .gif) ).
).
2. REMOVE FRONT BUMPER COVER (w/o Intuitive Parking Assist System)
(See page )
3. REMOVE FRONT BUMPER COVER (w/ Intuitive Parking Assist System)
(See page )
4. REMOVE FRONT FENDER LINER RH
(See page )
5. DRAIN WINDSHIELD WASHER FLUID
6. REMOVE WASHER INLET SUB-ASSEMBLY
7. REMOVE WASHER JAR
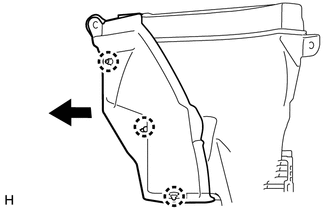
8. REMOVE WASHER JAR PROTECTOR
|
(a) Detach the 3 claws to remove the washer jar protector. |
|
9. REMOVE LEVEL WARNING SWITCH ASSEMBLY
|
(a) Disconnect the connector. |
|
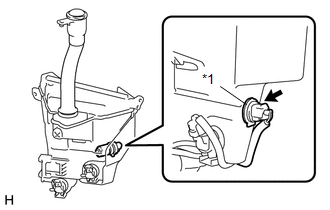
(b) Remove the level warning switch assembly from the packing of the washer jar.
Text in Illustration|
*1 |
Packing |
 Components
COMPONENTS
ILLUSTRATION
...
 Inspection
INSPECTION
PROCEDURE
1. INSPECT LEVEL WARNING SWITCH ASSEMBLY
HINT:
The following check should be performed with the windshield washer motor and
pump installed to the washer jar.
(a) Fill the w ...
Other materials about Toyota 4Runner:
Bleeding
BLEEDING
CAUTION / NOTICE / HINT
NOTICE:
As brake fluid may overflow, do not leave the brake fluid can in the
reservoir filler opening when adding brake fluid.
Bleed air while adding fluid to maintain the fluid level between the
MIN and ...
Installation
INSTALLATION
PROCEDURE
1. TEMPORARILY INSTALL FRONT STABILIZER LINK ASSEMBLY RH
(a) Temporarily install the front stabilizer link assembly with the bolt.
HINT:
Make sure that the identification mark on the front stabilizer link assembly
...

0.0256