Toyota 4Runner: Installation
INSTALLATION
CAUTION / NOTICE / HINT
HINT:
- Use the same procedure for the RH and LH sides.
- The procedure listed below is for the LH side.
PROCEDURE
1. INSTALL REAR DISC
(a) Align the matchmarks and install the rear disc.
HINT:
When replacing the disc with a new one, select the installation position where the disc has the smallest runout.
2. INSTALL REAR DISC BRAKE BUSH DUST BOOT
|
(a) Apply a light layer of lithium soap base glycol grease to the entire circumference of a new rear disc brake bush dust boot where it contacts the rear disc brake cylinder mounting, and the entire inner circumference of both ends. Text in Illustration
NOTICE: Apply a sufficient amount of lithium soap base glycol grease to the entire circumference of the rear disc brake bush dust boot and rear disc brake cylinder mounting contact surfaces. HINT: Apply at least 0.3 g (0.01 oz.) of lithium soap base glycol grease to the rear disc brake bush dust boot. |
|
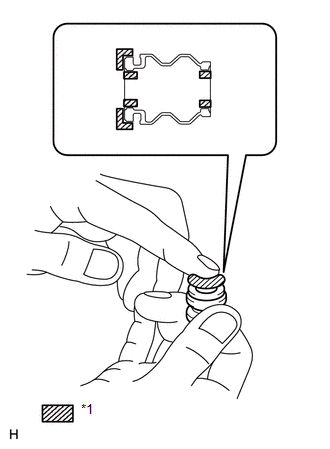
(b) Install the rear disc brake bush dust boot to the rear disc brake cylinder mounting.
3. INSTALL REAR DISC BRAKE CYLINDER SLIDE BUSH
|
(a) Apply a light coat of lithium soap base glycol grease to the rear disc brake cylinder slide bush. Text in Illustration
HINT: Apply at least 0.8 g (0.03 oz.) of lithium soap base glycol grease to the rear disc brake cylinder slide bush. |
|
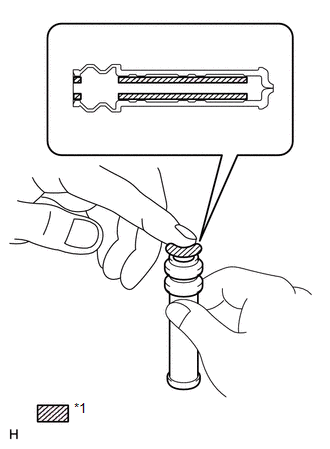
(b) Install the rear disc brake cylinder slide bush to the rear disc brake cylinder mounting.
|
(c) Apply a light coat of lithium soap base glycol grease to the cylinder slide pin, insert it into the rear disc brake cylinder slide bush in order to properly grease the parts, and then remove it. Text in Illustration
|
|
4. INSTALL REAR DISC BRAKE CYLINDER HOLE PLUG
|
(a) Apply a light coat of lithium soap base glycol grease to a new rear disc brake cylinder hole plug. Text in Illustration
|
|
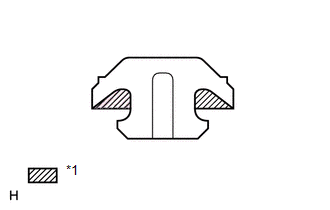
(b) Install the rear disc brake cylinder hole plug to the rear disc brake cylinder mounting.
5. INSTALL REAR DISC BRAKE CYLINDER MOUNTING LH
(a) Install the rear disc brake cylinder mounting and 2 plate washers with the 2 bolts.
Torque:
100 N·m {1020 kgf·cm, 74 ft·lbf}
6. INSTALL REAR NO. 1 DISC BRAKE PAD SUPPORT PLATE
(a) Install the 2 rear No. 1 disc brake pad support plates to the rear disc brake cylinder mounting.
7. INSTALL REAR NO. 2 DISC BRAKE PAD SUPPORT PLATE
(a) Install the 2 rear No. 2 disc brake pad support plates to the rear disc brake cylinder mounting.
8. INSTALL REAR DISC BRAKE PAD WEAR INDICATOR PLATE
(a) Install the rear disc brake pad wear indicator plate to the inner disc brake pad.
HINT:
Install the rear disc brake pad wear indicator facing downward.
9. INSTALL REAR DISC BRAKE ANTI-SQUEAL SHIM
NOTICE:
If necessary, replace the anti-squeal shim when replacing the brake pad.
(a) Install the rear disc brake anti-squeal shims to the rear disc brake pads.
NOTICE:
There should be no oil or grease on the friction surfaces of the brake pads and the rear disc.
10. INSTALL REAR DISC BRAKE PAD
(a) Install the 2 rear disc No. 1 and No. 2 brake pad support plates to the rear disc brake cylinder mounting.
(b) Install the 2 rear disc brake pads together with the rear disc brake anti-squeal shims to the rear disc brake cylinder.
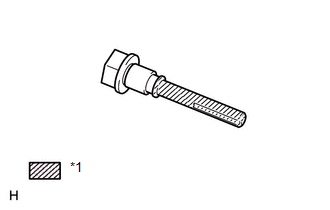
11. INSTALL REAR DISC BRAKE CYLINDER ASSEMBLY LH
|
(a) Apply a light coat of lithium soap base glycol grease to the sliding surfaces of the rear disc brake cylinder slide pins. Text in Illustration
|
|
(b) Install the rear disc brake cylinder with the 2 rear disc brake cylinder slide pins.
Torque:
88 N·m {900 kgf·cm, 65 ft·lbf}
12. CONNECT REAR FLEXIBLE HOSE LH
(a) Connect the rear flexible hose to the rear disc brake cylinder with the union bolt and a new gasket.
Torque:
31 N·m {316 kgf·cm, 23 ft·lbf}
13. BLEED BRAKE LINE
.gif)
14. INSTALL REAR WHEEL
 Reassembly
REASSEMBLY
PROCEDURE
1. INSTALL PISTON SEAL
(a) Apply a light layer of lithium soap base glycol grease to the entire
inner and outer circumference of a new piston seal.
Text in Il ...
 Rear Brake Flexible Hose
Components
COMPONENTS
ILLUSTRATION
ILLUSTRATION
Removal
REMOVAL
CAUTION / NOTICE / HINT
HINT:
Use the same procedure for the RH and LH sides.
The procedure listed below is ...
Other materials about Toyota 4Runner:
Rear Power Window RH does not Operate with Rear Power Window Switch RH
DESCRIPTION
If the manual up/down function does not operate, there may be a malfunction
in the rear power window regulator switch, rear power window regulator motor,
harness or connector.
WIRING DIAGRAM
CAUTION / NOTICE / HINT
NOTICE ...
Clearance Warning Ecu
Components
COMPONENTS
ILLUSTRATION
Removal
REMOVAL
PROCEDURE
1. DISCONNECT CABLE FROM NEGATIVE BATTERY TERMINAL
CAUTION:
Wait at least 90 seconds after disconnecting the cable from the negative (-)
battery terminal to disable the SRS system.
N ...
0.0105