Toyota 4Runner: Removal
REMOVAL
PROCEDURE
1. DISCONNECT CABLE FROM NEGATIVE BATTERY TERMINAL
NOTICE:
When disconnecting the cable, some systems need to be initialized after the cable
is reconnected (See page .gif) ).
).
2. REMOVE UPPER RADIATOR SUPPORT SEAL
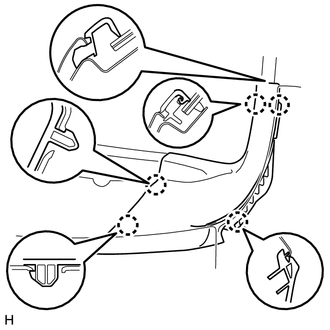
3. REMOVE FRONT FENDER MAIN SEAL LH
|
(a) Detach the 4 clips and 2 guides and remove the front fender main seal LH. |
|
4. REMOVE FRONT FENDER MAIN SEAL RH
HINT:
Use the same procedure described for the LH side.
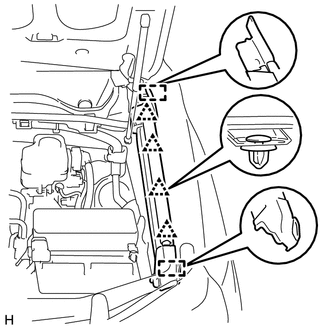
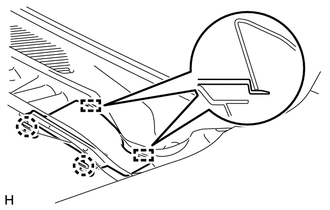
5. REMOVE FRONT FENDER TO COWL SIDE SEAL LH
|
(a) Detach the 5 claws and remove the front fender to cowl side seal LH. |
|
6. REMOVE FRONT FENDER TO COWL SIDE SEAL RH
HINT:
Use the same procedure described for the LH side.
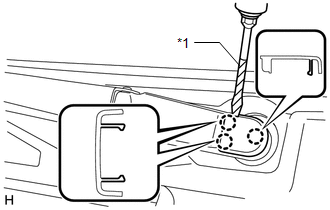
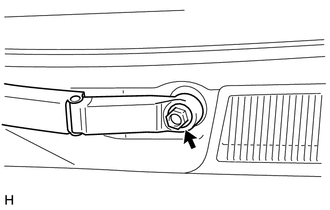
7. REMOVE FRONT WIPER ARM HEAD CAP
|
(a) Using a screwdriver, detach the 3 claws and remove the front wiper arm head cap. HINT:
|
|
8. REMOVE FRONT WIPER ARM AND BLADE ASSEMBLY LH
|
(a) Remove the nut and the front wiper arm and blade assembly LH. |
|
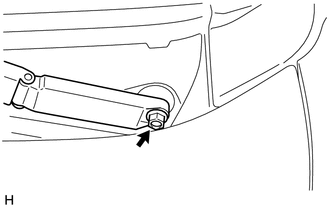
9. REMOVE FRONT WIPER ARM AND BLADE ASSEMBLY RH
|
(a) Remove the nut and the front wiper arm and blade assembly RH. |
|
10. REMOVE CENTER NO. 2 COWL TOP VENTILATOR LOUVER
|
(a) Detach the 2 claws and 2 guides and remove the center No. 2 cowl top ventilator louver. |
|
11. REMOVE COWL TOP VENTILATOR LOUVER SUB-ASSEMBLY
|
(a) Remove the 2 clips. |
|
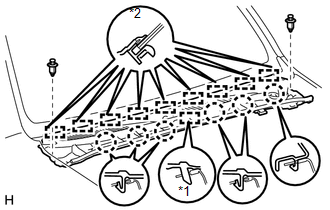
(b) Detach the 6 claws and guide (A).
Text in Illustration|
*1 |
Guide A |
|
*2 |
Guide B |
(c) Detach the 9 guides (B) and pull out the cowl top ventilator louver sub-assembly.
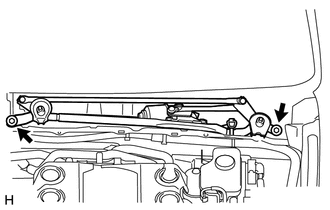
12. REMOVE WINDSHIELD WIPER MOTOR AND LINK
|
(a) Detach the clamp and disconnect the connector. |
|
|
(b) Remove the 2 bolts. |
|
|
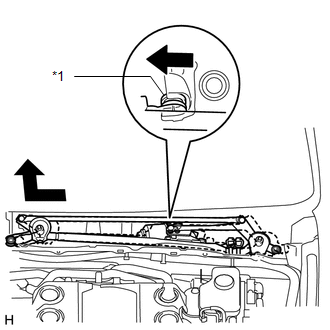
(c) Detach the grommet and remove the windshield wiper motor and link as shown in the illustration. Text in Illustration
NOTICE: Be careful not to damage the windshield when removing the windshield wiper motor and link assembly. |
|
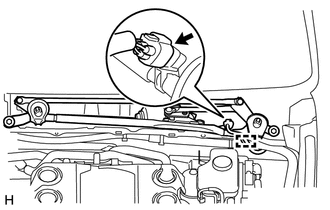
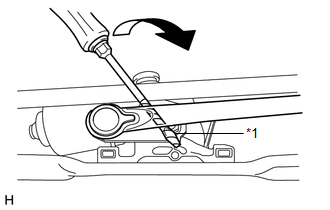
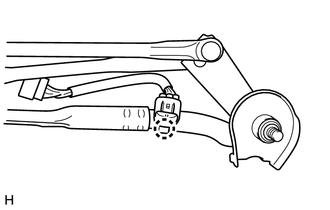
13. REMOVE WINDSHIELD WIPER MOTOR ASSEMBLY
|
(a) Using a screwdriver, separate the windshield wiper link rod from the crank arm pivot of the front wiper crank sub-assembly as shown in the illustration. HINT: Tape the screwdriver tip before use. Text in Illustration
|
|
|
(b) Disconnect the connector. |
|
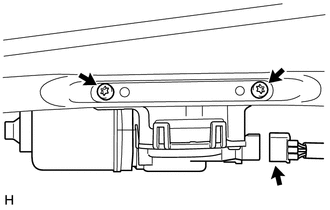
(c) Using a T30 "TORX" socket, remove the 2 bolts and windshield wiper motor.
14. REMOVE WIPER MOTOR WIRE
|
(a) Detach the claw and remove the wiper motor wire. |
|
 Inspection
INSPECTION
CAUTION / NOTICE / HINT
NOTICE:
Make sure that fingers or articles of clothing do not get caught in moving parts
when performing this test.
PROCEDURE
1. INSPECT WINDSHIELD WIPER MOTO ...
 Installation
INSTALLATION
PROCEDURE
1. INSTALL WIPER MOTOR WIRE
(a) Attach the claw to install the wiper motor wire.
2. INSTALL WINDSHIELD WIPER MOTOR ASSEMBLY
(a) Using a T30 "TORX" socket, install ...
Other materials about Toyota 4Runner:
Noise Occurs
PROCEDURE
1.
NOISE CONDITION
(a) Check from which direction the noise comes (front left or right, or rear
left or right).
OK:
The location of the noise source can be determined.
NG
GO TO STEP 3
...
Key-off Operation Function Operates even if Operating Conditions are not Satisfied
DESCRIPTION
When the front doors are closed, each power window regulator motor can
control its power window operation for approximately 43 seconds after the
ignition switch is turned from ON to off by receiving operation permission
signals ...
0.0066