Toyota 4Runner: Removal
REMOVAL
PROCEDURE
1. REMOVE FRONT WHEEL
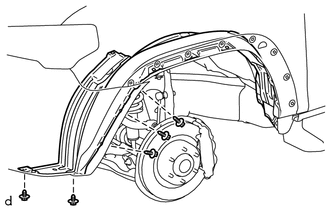
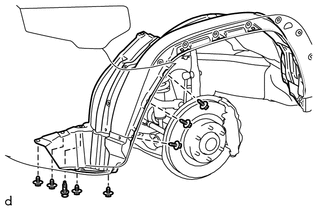
2. REMOVE FRONT FENDER MUDGUARD LH (w/o Intuitive Parking Assist System)
.gif)
3. REMOVE ROCKER PANEL MOULDING COVER LH (w/o Intuitive Parking Assist System)
4. REMOVE FRONT FENDER MOULDING SUB-ASSEMBLY LH (w/o Intuitive Parking Assist System)
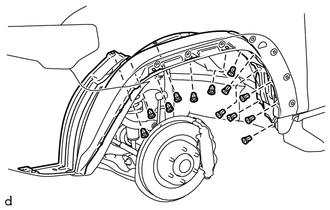
5. REMOVE FRONT FENDER LINER LH (w/o Intuitive Parking Assist System)
|
(a) Remove the 5 screws. |
|
|
(b) Remove the 13 grommets and front fender liner LH. HINT: The grommets need to be replaced with new ones because they will break when they are removed. |
|
6. REMOVE FRONT FENDER MUDGUARD LH (w/ Intuitive Parking Assist System)
7. REMOVE ROCKER PANEL MOULDING LH (w/ Intuitive Parking Assist System)
8. REMOVE FRONT FENDER MOULDING SUB-ASSEMBLY LH (w/ Intuitive Parking Assist System)
9. REMOVE FRONT FENDER LINER LH (w/ Intuitive Parking Assist System)
|
(a) Remove the clip and 7 screws. |
|
|
(b) Remove the 13 grommets and front fender liner LH. HINT: The grommets need to be replaced with new ones because they will break when they are removed. |
|

10. REMOVE WIRELESS DOOR LOCK BUZZER
|
(a) Disconnect the connector. |
|

(b) Detach the clamp to remove the wireless door lock buzzer.
 Components
COMPONENTS
ILLUSTRATION
ILLUSTRATION
...
 Inspection
INSPECTION
PROCEDURE
1. INSPECT WIRELESS DOOR LOCK BUZZER
(a) Measure the resistance according to the value(s) in the table below.
HINT:
The buzzer activation circuit is built into ...
Other materials about Toyota 4Runner:
Mudguard
Components
COMPONENTS
ILLUSTRATION
ILLUSTRATION
Removal
REMOVAL
CAUTION / NOTICE / HINT
HINT:
Use the same procedure for both the RH and LH sides.
The procedure listed below is for LH side.
PROCEDURE
1. REMOVE FRONT FENDER M ...
Front Passenger Side Solar Sensor Short Circuit (B14A3)
DESCRIPTION
The automatic light control sensor (solar sensor), which is installed on the
upper side of the instrument panel, detects sunlight and controls the air conditioning
in auto mode. The output current from the solar sensor varies according to th ...

0.0068