
Toyota 4Runner: Crawl Switch
Components
COMPONENTS
ILLUSTRATION
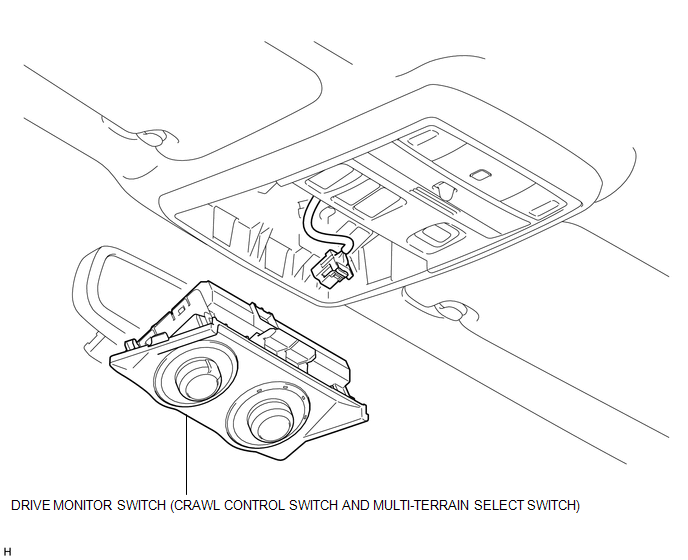
Removal
REMOVAL
PROCEDURE
1. REMOVE DRIVE MONITOR SWITCH (CRAWL CONTROL SWITCH AND MULTI-TERRAIN SELECT SWITCH)
|
(a) Detach the 4 claws and remove the drive monitor switch (CRAWL control switch and multi-terrain select switch) from the map light assembly. |
|
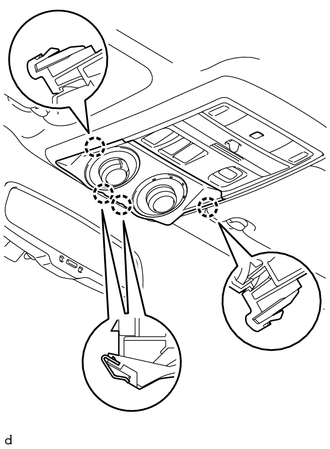
(b) Disconnect the connector.
Installation
INSTALLATION
PROCEDURE
1. INSTALL DRIVE MONITOR SWITCH (CRAWL CONTROL SWITCH AND MULTI-TERRAIN SELECT SWITCH)
(a) Connect the connector.
(b) Attach the 4 claws to install the drive monitor switch (CRAWL control switch and multi-terrain select switch).
2. PERFORM CRAWL CONTROL CALIBRATION
(a) Perform crawl control calibration (See page
.gif) ).
).
 Installation
INSTALLATION
PROCEDURE
1. INSTALL BRAKE ACTUATOR BOLT CUSHION
(a) Install the 3 brake actuator bolt cushions to the brake actuator bracket.
2. INSTALL BRAKE ACTUATOR CASE COLLAR
(a) Install the 3 ...
 Downhill Assist Control Switch
Components
COMPONENTS
ILLUSTRATION
Removal
REMOVAL
PROCEDURE
1. REMOVE DRIVE MONITOR SWITCH
2. REMOVE MAP LIGHT ASSEMBLY
3. REMOVE DOWNHILL ASSIST CONTROL SWITCH
(a) Di ...
Other materials about Toyota 4Runner:
Steering Angle Sensor Initialization Incomplete (C1439,C1445)
DESCRIPTION
The skid control ECU acquires steering angle sensor zero point every time the
ignition switch is turned to ON and the vehicle is driven at 40 km/h (25 mph) or
more for approximately 10 seconds. The ECU also stores the previous zero point.
The ...
Airbag Signal Malfunction/Not Input (B15C4)
DESCRIPTION
If the DCM (Telematics Transceiver) detects an error in the communication between
the DCM (Telematics Transceiver) and center airbag sensor assembly as a result of
the DCM (Telematics Transceiver) self check, this DTC will be set.
...

0.0115