Toyota 4Runner: Disassembly
DISASSEMBLY
PROCEDURE
1. REMOVE BACK DOOR OPENER SWITCH ASSEMBLY
.gif)
2. REMOVE NO. 2 BACK DOOR OUTSIDE GARNISH
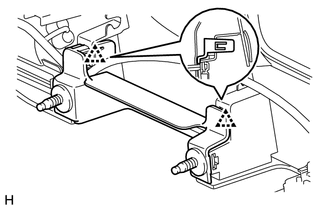
(a) Detach the 2 clips and No. 2 back door outside garnish.
3. REMOVE LICENSE PLATE LIGHT ASSEMBLY
4. REMOVE BACK DOOR OUTSIDE GARNISH SEAL
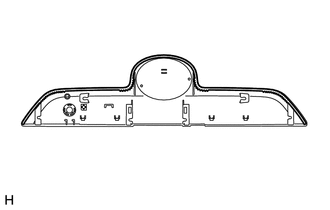
(a) Remove the back door outside garnish seal.
5. REMOVE NO. 1 BACK DOOR GARNISH RETAINER (w/o Smart Key System)
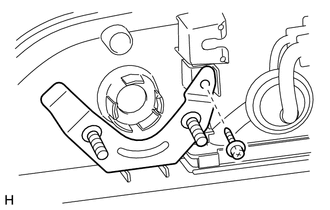
(a) Remove the screw and No. 1 back door garnish retainer.
6. REMOVE BACK DOOR CONTROL SWITCH (w/ Smart Key System)
 Removal
REMOVAL
PROCEDURE
1. REMOVE ASSIST STRAP HOLE COVER
2. REMOVE ASSIST STRAP ASSEMBLY
3. REMOVE BACK DOOR TRIM PANEL ASSEMBLY
4. REMOVE MULTIPLEX NETWORK DOOR ECU
5. REMOVE NO. 2 BACK ...
 Reassembly
REASSEMBLY
CAUTION / NOTICE / HINT
HINT:
When installing the back door outside garnish seal, heat the back door outside
garnish surface using a heat light.
Standard:
Item
...
Other materials about Toyota 4Runner:
Removal
REMOVAL
PROCEDURE
1. REMOVE JACK BOX HOLE COVER
2. REMOVE REAR QUARTER PANEL MUDGUARD LH
3. REMOVE REAR QUARTER PANEL MUDGUARD RH
HINT:
Use the same procedure as for the LH side.
4. REMOVE REAR BUMPER COVER
5. REMOVE NO. 3 FLOOR WIRE
6. RE ...
Rear No. 2 Seat Inner Belt Assembly
Components
COMPONENTS
ILLUSTRATION
Installation
INSTALLATION
CAUTION / NOTICE / HINT
HINT:
A bolt without a torque specification is shown in the standard bolt chart (See
page ).
PROCEDURE
1. INSTALL REAR NO. 2 SEAT INNER BELT SUB-ASSEMBLY
(a ...

0.0263