Toyota 4Runner: Installation
INSTALLATION
CAUTION / NOTICE / HINT
HINT:
- Use the same procedure for the RH and LH sides.
- The procedure listed below is for the LH side.
- A bolt without a torque specification is shown in the standard bolt
chart (See page
.gif) ).
).
PROCEDURE
1. TEMPORARILY INSTALL FRONT NO. 1 SUSPENSION LOWER ARM SUB-ASSEMBLY LH
|
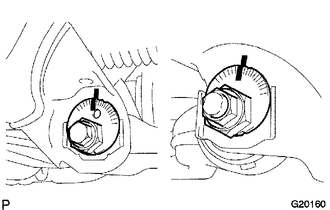
(a) Temporarily install the lower suspension arm, camber adjust cam, No. 2 camber adjust cam, No. 2 toe adjust plate and toe adjust cam with the bolt and nut. Text in Illustration
|
|
.png)
(b) Align the matchmarks on the No. 2 camber adjust cam and toe adjust cam sub-assembly with the matchmarks on the vehicle body. Tighten the bolt and nut.
(c) Install the front lower ball joint attachment LH with a new nut and cotter pin.
Torque:
140 N·m {1428 kgf·cm, 103 ft·lbf}
(d) Connect the front lower ball joint attachment LH to the steering knuckle with the 2 bolts.
Torque:
160 N·m {1632 kgf·cm, 118 ft·lbf}
2. TEMPORARILY INSTALL FRONT SHOCK ABSORBER WITH COIL SPRING
(a) Temporarily install the front shock absorber with coil spring and washer with the bolt and nut.
3. INSTALL FRONT STABILIZER BAR (w/ KDSS)
4. INSTALL FRONT STABILIZER END BRACKET (w/ KDSS)
5. INSTALL FRONT SUSPENSION MEMBER BRACE SUB-ASSEMBLY (w/ KDSS)
6. INSTALL NO. 1 ENGINE UNDER COVER SUB-ASSEMBLY (w/ KDSS)
7. INSTALL LOWER FRONT BUMPER COVER (w/ KDSS)
8. INSTALL FRONT WHEEL
Torque:
for aluminum wheel :
103 N·m {1050 kgf·cm, 76 ft·lbf}
for steel wheel :
112 N·m {1142 kgf·cm, 83 ft·lbf}
9. STABILIZE SUSPENSION
10. TIGHTEN FRONT NO. 1 SUSPENSION LOWER ARM SUB-ASSEMBLY LH
|
(a) Tighten the bolt and nut. Torque: 175 N·m {1785 kgf·cm, 129 ft·lbf} |
|
11. TIGHTEN FRONT SHOCK ABSORBER WITH COIL SPRING
(a) Tighten the nut.
Torque:
95 N·m {969 kgf·cm, 70 ft·lbf}
12. INSPECT AND ADJUST FRONT WHEEL ALIGNMENT
(a) Inspect and adjust the front wheel alignment (See page
).
 Inspection
INSPECTION
PROCEDURE
1. INSPECT FRONT NO. 1 SUSPENSION LOWER ARM SUB-ASSEMBLY LH
(a) As shown in the illustration, flip the ball joint stud back and forth
5 times before installing t ...
 Reassembly
REASSEMBLY
PROCEDURE
1. INSTALL LOWER BALL JOINT DUST COVER LH
(a) Pack the lower arm ball joint with MP grease.
Grease capacity:
8.0 g (0.282 oz.)
(b) Apply MP grease to the locatio ...
Other materials about Toyota 4Runner:
Removal
REMOVAL
CAUTION / NOTICE / HINT
HINT:
Use the same procedure for the RH and LH sides.
The procedure listed below is for the LH side.
PROCEDURE
1. REMOVE ROOF RAIL ASSEMBLY LH (w/ Roof Rack)
(a) Remove the roof rail (See page ).
2. REM ...
Removal
REMOVAL
PROCEDURE
1. REMOVE SIDE STEP ASSEMBLY LH
2. REMOVE STABILIZER CONTROL VALVE PROTECTOR
3. DRAIN SUSPENSION FLUID
4. REMOVE REAR STABILIZER LOWER BRACKET
(a) Remove the 4 bolts and 2 rear stabilizer lower brackets.
...

0.0273