Toyota 4Runner: Removal
REMOVAL
PROCEDURE
1. DISCONNECT CABLE FROM NEGATIVE BATTERY TERMINAL
NOTICE:
When disconnecting the cable, some systems need to be initialized after the cable
is reconnected (See page .gif) ).
).
2. REMOVE FRONT BUMPER COVER (w/o Intuitive Parking Assist System)
(See page )
3. REMOVE FRONT BUMPER COVER (w/ Intuitive Parking Assist System)
(See page )
4. REMOVE FRONT FENDER LINER RH
(See page )
5. DRAIN WINDSHIELD WASHER FLUID
|
(a) Disconnect the washer hose from the hose of the windshield washer motor and pump assembly and drain the windshield washer fluid. |
|
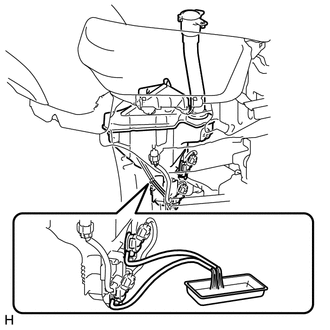
6. REMOVE WASHER INLET SUB-ASSEMBLY
|
(a) Detach the clip and remove the washer inlet sub-assembly. |
|
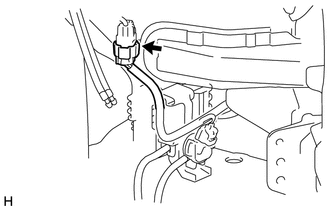
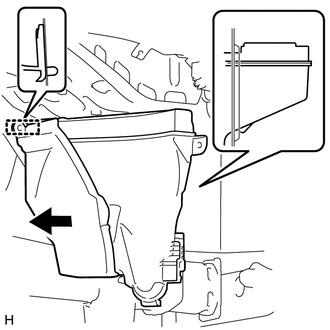
7. REMOVE WASHER JAR
|
(a) Disconnect the connector. |
|
|
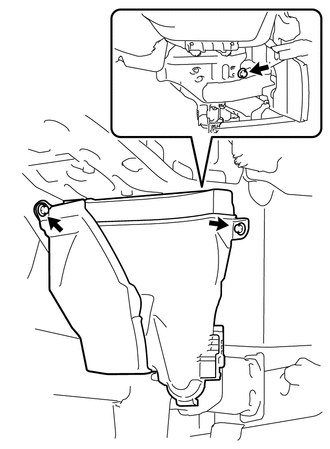
(b) Remove the 3 screws. |
|
|
(c) Detach the guide to remove the washer jar. |
|
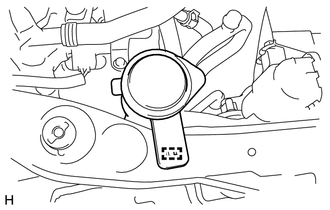
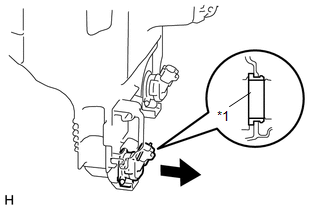
8. REMOVE WINDSHIELD WASHER MOTOR AND PUMP ASSEMBLY
|
(a) Remove the windshield washer motor and pump assembly from the packing of the washer jar. Text in Illustration
|
|
 Components
COMPONENTS
ILLUSTRATION
...
 Inspection
INSPECTION
PROCEDURE
1. INSPECT WINDSHIELD WASHER MOTOR AND PUMP ASSEMBLY
(a) Remove the washer jar.
(b) Disconnect the windshield washer motor and pump connector.
HINT:
Make sure that the winds ...
Other materials about Toyota 4Runner:
Satellite Radio Broadcast cannot be Selected or After Selecting Broadcast, Broadcast
cannot be Added into Memory
CAUTION / NOTICE / HINT
NOTICE:
Some satellite radio broadcasts require payment. A contract must be
made between a satellite radio company and the user. If the contract expires,
it will not be possible to listen to the broadcast.
PROCE ...
Slip Indicator Light Remains ON
DESCRIPTION
The slip indicator light blinks during VSC, TRAC, crawl control, multi-terrain
select control or trailer sway control operation. When the system fails, the slip
indicator light comes on to warn the driver.
WIRING DIAGRAM
CAUTION / NOTICE / ...

0.0247