Toyota 4Runner: Removal
REMOVAL
PROCEDURE
1. DISCONNECT CABLE FROM NEGATIVE BATTERY TERMINAL
NOTICE:
When disconnecting the cable, some systems need to be initialized after the cable
is reconnected (See page .gif) ).
).
2. REMOVE NO. 1 ENGINE UNDER COVER SUB-ASSEMBLY
.gif)
3. REMOVE REAR ENGINE UNDER COVER ASSEMBLY
.gif)
4. REMOVE FRONT FENDER APRON SEAL RH
.gif)
5. REMOVE FRONT NO. 1 FENDER APRON TO FRAME SEAL RH
.gif)
6. DRAIN AUTOMATIC TRANSMISSION FLUID
.gif)
7. REMOVE PROPELLER SHAFT ASSEMBLY
(a) Remove the propeller shaft (See page .gif) ).
).
8. REMOVE FRONT EXHAUST PIPE ASSEMBLY
(a) Remove the front exhaust pipe (See page .gif)
).
9. REMOVE MANIFOLD STAY
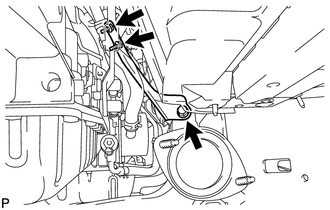
(a) Remove the 3 bolts and stay.
10. REMOVE NO. 2 MANIFOLD STAY
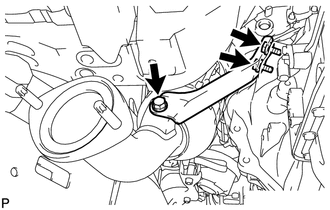
(a) Remove the 3 bolts and stay.
11. DISCONNECT TRANSMISSION CONTROL CABLE ASSEMBLY
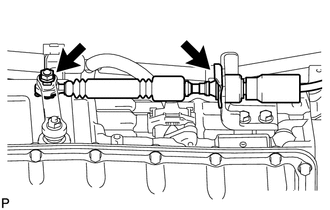
(a) Remove the nut and clip, and disconnect the transmission control cable from the transmission.
12. DISCONNECT NO. 1 OIL COOLER INLET TUBE AND NO. 1 OIL COOLER OUTLET TUBE
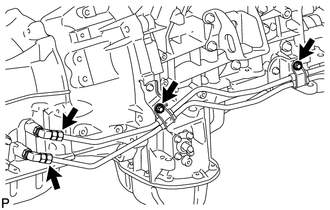
(a) Remove the 2 bolts to open the 2 No. 2 flexible hose clamps.
(b) Using a union nut wrench, disconnect the inlet tube and outlet tube from each oil cooler tube union.
13. REMOVE STARTER ASSEMBLY
(a) Remove the starter (See page .gif) ).
).
14. REMOVE DRIVE PLATE AND TORQUE CONVERTER CLUTCH SETTING BOLT
(a) Remove the flywheel housing side cover.
|
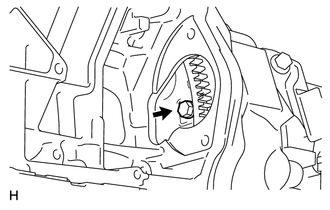
(b) Turn the crankshaft to gain access to the 6 bolts and remove each bolt while holding the crankshaft pulley bolt with a wrench. |
|
15. SUPPORT AUTOMATIC TRANSMISSION ASSEMBLY
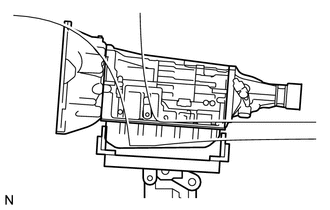
(a) Support the transmission with a transmission jack. Lift the transmission slightly from the crossmember.
16. REMOVE FRONT SUSPENSION MEMBER BRACKET LH AND RH (for X-Runner)
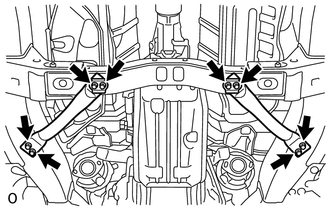
(a) Remove the 8 bolts and front suspension member bracket LH and RH.
17. REMOVE NO. 3 FRAME CROSSMEMBER SUB-ASSEMBLY
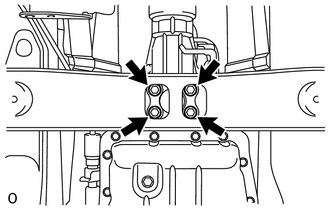
(a) Remove the 4 bolts of the rear engine mounting insulator.
|
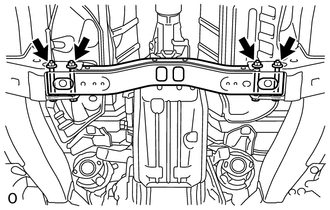
(b) Remove the 4 nuts, 4 bolts and frame crossmember. |
|
18. REMOVE REAR NO. 1 ENGINE MOUNTING INSULATOR
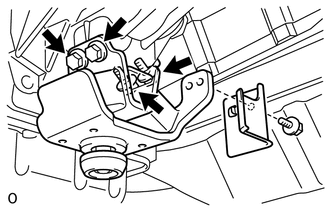
(a) Remove the bolt and rear engine mounting heat insulator.
(b) Remove the 4 bolts and rear engine mounting insulator from the transmission.
19. DISCONNECT WIRE HARNESS AND CONNECTOR
|
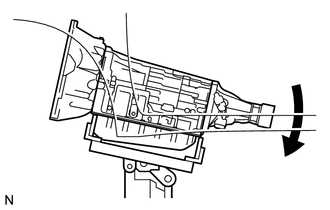
(a) Tilt the transmission downward. NOTICE: Make sure the cooling fan does not contact the fan shroud. |
|
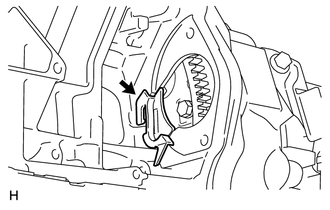
(b) Disconnect the park/neutral position switch connector, transmission wire connector and 2 speed sensor connectors.
HINT:
Detach the claw, press down the lever, and then disconnect the transmission wire connector.
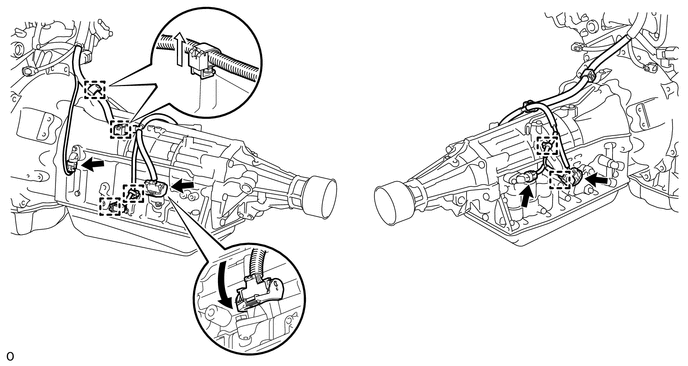
(c) Detach the 2 connector clamps and 4 harness clamps, and disconnect the wire harness.
20. DISCONNECT BREATHER PLUG HOSE
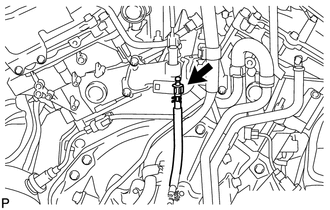
(a) Disconnect the breather plug hose from the engine side.
21. REMOVE AUTOMATIC TRANSMISSION ASSEMBLY
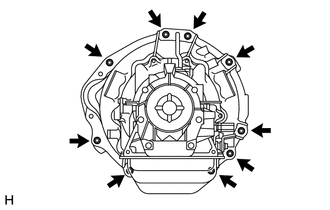
(a) Remove the 9 bolts and automatic transmission.
NOTICE:
Do not use excess force when prying the transmission assembly.
22. REMOVE HARNESS CLAMP BRACKET
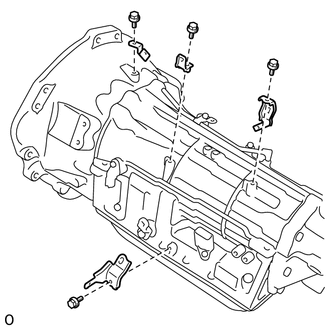
(a) Remove the 4 bolts and 4 harness clamp brackets.
23. REMOVE NO. 1 TRANSMISSION CONTROL CABLE BRACKET
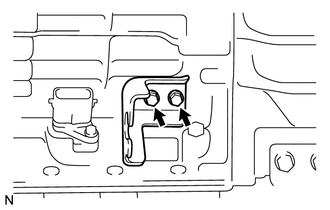
(a) Remove the 2 bolts and transmission control cable bracket.
24. REMOVE TORQUE CONVERTER CLUTCH ASSEMBLY
25. INSPECT TORQUE CONVERTER CLUTCH ASSEMBLY
(a) Inspect the torque converter clutch (See page
.gif) ).
).
 Components
COMPONENTS
ILLUSTRATION
ILLUSTRATION
...
 Installation
INSTALLATION
PROCEDURE
1. INSTALL TORQUE CONVERTER CLUTCH ASSEMBLY
(a) Using a vernier caliper and straightedge, measure dimension "A" between the
transmission fitting surface of the ...
Other materials about Toyota 4Runner:
Problem Symptoms Table
PROBLEM SYMPTOMS TABLE
HINT:
Use the table below to help determine the cause of problem symptoms.
If multiple suspected areas are listed, the potential causes of the symptoms
are listed in order of probability in the "Suspected Area" ...
Tires
Replace or rotate tires in accordance with maintenance schedules and
treadwear.
Checking tires
1. New tread
2. Treadwear indicator
3. Worn tread
The location of treadwear indicators is shown by the “TWI” or “Δ” marks,
etc., molded on the ...
0.0274

