Toyota 4Runner: Disassembly
DISASSEMBLY
PROCEDURE
1. REMOVE RADIATOR GRILLE
.gif)
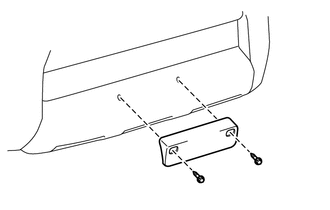
2. REMOVE FRONT BUMPER EXTENSION MOUNTING BRACKET (w/ License Plate Bracket)
|
(a) Remove the 2 screws to remove the front bumper extension mounting bracket. |
|
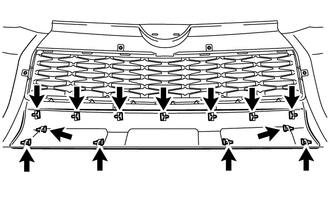
3. REMOVE LOWER FRONT VALANCE PANEL (w/ Garnish)
|
(a) Remove the 13 outside moulding retainers and lower front valance panel as shown in the illustration. |
|
4. REMOVE LOWER NO. 1 RADIATOR GRILLE
|
(a) Remove the clip. |
|
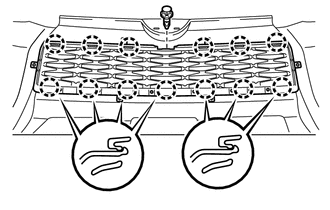
(b) Detach the 13 claws to remove the lower No. 1 radiator grille.
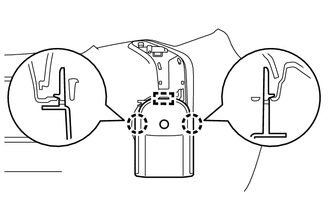
5. REMOVE FRONT BUMPER REINFORCEMENT STOPPER RH (for RH Side)
|
(a) Detach the 2 claws and guide to remove the front bumper reinforcement stopper RH. |
|
6. REMOVE FOG LIGHT ASSEMBLY LH
7. REMOVE FOG LIGHT ASSEMBLY RH
HINT:
Use the same procedure as for the LH side.
8. REMOVE FOG LIGHT COVER LH
|
(a) Remove the outside moulding retainer. |
|
(b) Detach the 5 claws to remove the fog light cover LH.
9. REMOVE FOG LIGHT COVER RH
HINT:
Use the same procedure as for the LH side.
 Removal
REMOVAL
PROCEDURE
1. REMOVE UPPER RADIATOR SUPPORT SEAL
2. REMOVE FRONT BUMPER COVER
(a) Put protective tape around the front bumper cover.
(b) Remove the 3 bolts, 10 screws and 6 clips.
(c) ...
 Reassembly
REASSEMBLY
PROCEDURE
1. INSTALL FOG LIGHT COVER LH
(a) Attach the 5 claws to install the fog light cover LH.
(b) Install the outside moulding retainer.
2. INSTALL FOG LIGHT COVER RH
HINT:
Use t ...
Other materials about Toyota 4Runner:
Diagnostic Trouble Code Chart
DIAGNOSTIC TROUBLE CODE CHART
HINT:
If a trouble code is output during the DTC check, inspect the trouble areas listed
for that code. For details of the code, refer to the "See page" below.
Certification ECU
DTC Code
Detec ...
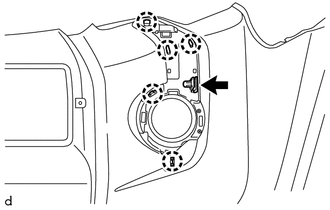
Amplifier Antenna
Components
COMPONENTS
ILLUSTRATION
Removal
REMOVAL
PROCEDURE
1. REMOVE ROOF HEADLINING ASSEMBLY
(See page )
2. REMOVE AMPLIFIER ANTENNA ASSEMBLY
(a) Disconnect the 3 connectors.
( ...

0.0257