Toyota 4Runner: Health Check
HEALTH CHECK
1. HEALTH CHECK
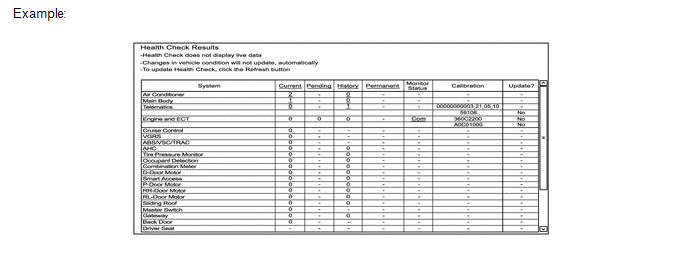
Health Check provides an overall view of the vehicle status including telematics. Health Check will provide the DCM (Telematics Transceiver) software version, PRL version, and applicable DTCs and fault codes related to telematics.
(a) Connect the Techstream to the DLC3.
(b) Turn the ignition switch to ON.
(c) Click "Health Check".
|
Fault Code |
Reason |
|---|---|
|
62 |
VIN not recognized by telematics provider |
|
64 |
DCM (Telematics Transceiver) not recognized |
|
65 |
VIN mismatch with DCM (Telematics Transceiver) |
HINT:
- If Health Check results in a telematics issue, a specific Fault Code will be displayed.
- If a fault code occurs, follow the procedure below:
- Fault 62*: Press the manual (SOS) switch and inform the operator of the error message.
- Fault 64: Press the manual (SOS) switch and inform the operator of the error message.
- Fault 65*: Replace the DCM (Telematics Transceiver) with a new
service part and perform DCM Activation.
- *: Verify that the VIN is correct in the vehicle ECU. Run Vehicle Inquiry on the Techstream and verify that the VIN is correct.
(d) Data is displayed under "Telematics".

 Dcm Activation
DCM ACTIVATION
1. DCM ACTIVATION
This function should be used to activate the DCM (Telematics Transceiver) after
a new DCM (Telematics Transceiver) has been installed. During the DCM (Telematics
...
 Acn Call End
ACN CALL END
1. ACN CALL END
This function terminates the ACN (Automatic Collision Notification) to the telematics
provider. After a collision in which the DCM receives a "Collision Detection ...
Other materials about Toyota 4Runner:
On-vehicle Inspection
ON-VEHICLE INSPECTION
PROCEDURE
1. INSPECT SEAT HEATER CONTROL SUB-ASSEMBLY LH
(a) Disconnect the b2 seat heater control sub-assembly LH connector.
(b) Measure the resistance according to the value( ...
Personal Light(for Rear Door)
Components
COMPONENTS
ILLUSTRATION
Removal
REMOVAL
CAUTION / NOTICE / HINT
HINT:
Use the same procedure for the RH and LH sides.
The procedure listed below is for the LH side.
PROCEDURE
1. REMOVE REAR DOOR INSIDE HANDLE BEZEL L ...
0.0084
