
Toyota 4Runner: Reassembly
REASSEMBLY
PROCEDURE
1. INSTALL PISTON SEAL
|
(a) Apply a light layer of lithium soap base glycol grease to the entire inner and outer circumference of a new piston seal. Text in Illustration
|
|
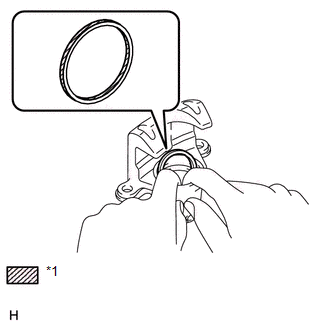
(b) Install the piston seal to the rear disc brake cylinder.
2. INSTALL CYLINDER BOOT
|
(a) Apply a light layer of lithium soap base glycol grease to the entire inner circumference of a new cylinder boot. Text in Illustration
|
|
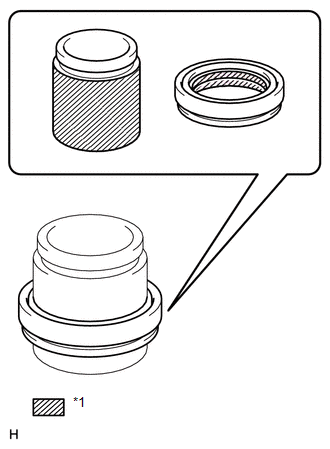
(b) Apply a light layer of lithium soap base glycol grease to the entire outer circumference of the rear disc brake piston where it contacts the rear disc brake cylinder.
(c) Install the cylinder boot to the rear disc brake piston.
(d) Install the rear disc brake piston to the rear disc brake cylinder.
NOTICE:
Do not forcibly install the piston into the disc brake cylinder.
3. INSTALL REAR DISC BRAKE PISTON
(a) Install the cylinder boot to the rear disc brake cylinder.
NOTICE:
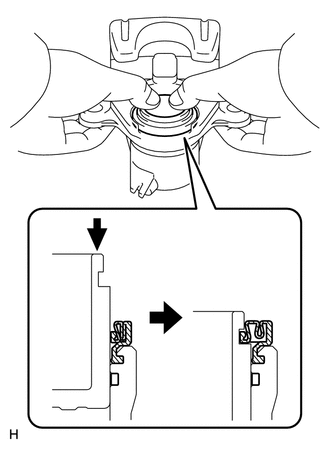
Install the boot securely into the groove of the disc brake cylinder.
|
(b) Push in the rear disc brake piston by hand and install the cylinder boot into the groove of the rear disc brake piston. NOTICE: Install the boot securely into the groove of the piston. |
|
4. TEMPORARILY INSTALL REAR DISC BRAKE BLEEDER PLUG
(a) Temporarily install the bleeder plug to the rear disc brake cylinder.
HINT:
The bleeder plug will be tightened to the torque specification in the "Bleed Brake Line" procedure.
5. INSTALL REAR DISC BRAKE BLEEDER PLUG CAP
 Inspection
INSPECTION
PROCEDURE
1. CHECK PAD LINING THICKNESS
(a) Using a ruler, measure the pad lining thickness.
Standard thickness:
10.0 mm (0.394 in.)
Minimum thickness:
1.0 mm (0 ...
 Installation
INSTALLATION
CAUTION / NOTICE / HINT
HINT:
Use the same procedure for the RH and LH sides.
The procedure listed below is for the LH side.
PROCEDURE
1. INSTALL REAR DISC
(a) Ali ...
Other materials about Toyota 4Runner:
Data List / Active Test
DATA LIST / ACTIVE TEST
1. ACTIVE TEST
HINT:
Using the Techstream to perform Active Tests allows relays, VSVs, actuators and
other items to be operated without removing any parts. This non-intrusive functional
inspection can be very useful because inter ...
Luggage Room Light Circuit
DESCRIPTION
The multiplex network door ECU controls the spot light.
WIRING DIAGRAM
CAUTION / NOTICE / HINT
NOTICE:
Inspect the fuses and bulbs for circuits related to this system before performing
the following inspection procedure.
PROCEDURE
...

0.0097