Toyota 4Runner: Removal
REMOVAL
CAUTION / NOTICE / HINT
HINT:
- Use the same procedure for the RH and LH sides.
- The procedure listed below is for the LH side.
PROCEDURE
1. REMOVE FRONT WHEEL
2. REMOVE DISC BRAKE CYLINDER ASSEMBLY LH
.gif)
3. REMOVE FRONT DISC
4. REMOVE FRONT AXLE HUB SUB-ASSEMBLY LH
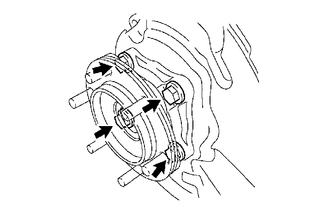
(a) Remove the 4 bolts, axle hub and disc brake dust cover from the steering knuckle.
(b) Remove the O-ring from the axle hub.
 On-vehicle Inspection
ON-VEHICLE INSPECTION
PROCEDURE
1. REMOVE FRONT WHEEL
2. REMOVE DISC BRAKE CYLINDER ASSEMBLY LH
3. REMOVE FRONT DISC
4. INSPECT FRONT AXLE HUB BEARING LOOSENESS
(a) Using a dial ...
 Disassembly
DISASSEMBLY
CAUTION / NOTICE / HINT
PROCEDURE
1. REMOVE FRONT WHEEL ADJUSTING NUT LH
(a) Using SST and a hammer, unstake the adjusting nut.
SST: 09930-00010
(b) Using SST, remove th ...
Other materials about Toyota 4Runner:
Adjusting the position of and opening and closing the air outlets
Front center outlets
1. Direct air flow to the left or right, up or down.
2. Turn the knob to open or close the vent.
Front side outlets
1. Direct air flow to the left or right, up or down.
2. Turn the knob to open or close the vent.
Rear outlets
...
Terminals Of Ecu
TERMINALS OF ECU
1. CHECK SLIDING ROOF DRIVE GEAR SUB-ASSEMBLY (SLIDING ROOF ECU)
(a) Disconnect the S10 sliding roof drive gear sub-assembly connector.
(b) Measure the resistance and voltage according to the value(s) in the table
below.
HINT:
Measure ...

0.0066